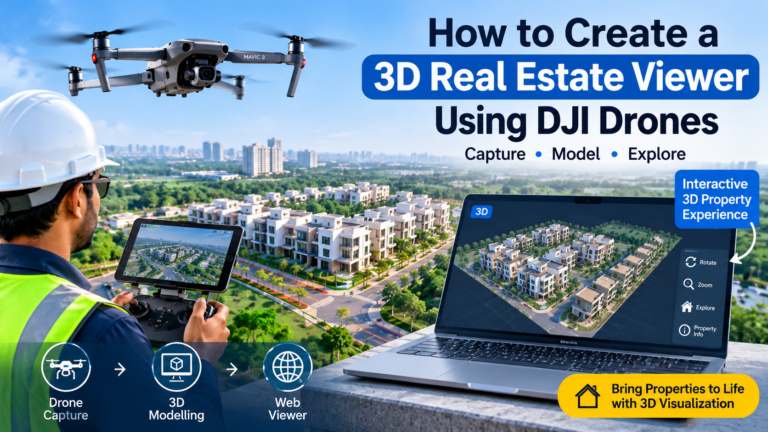
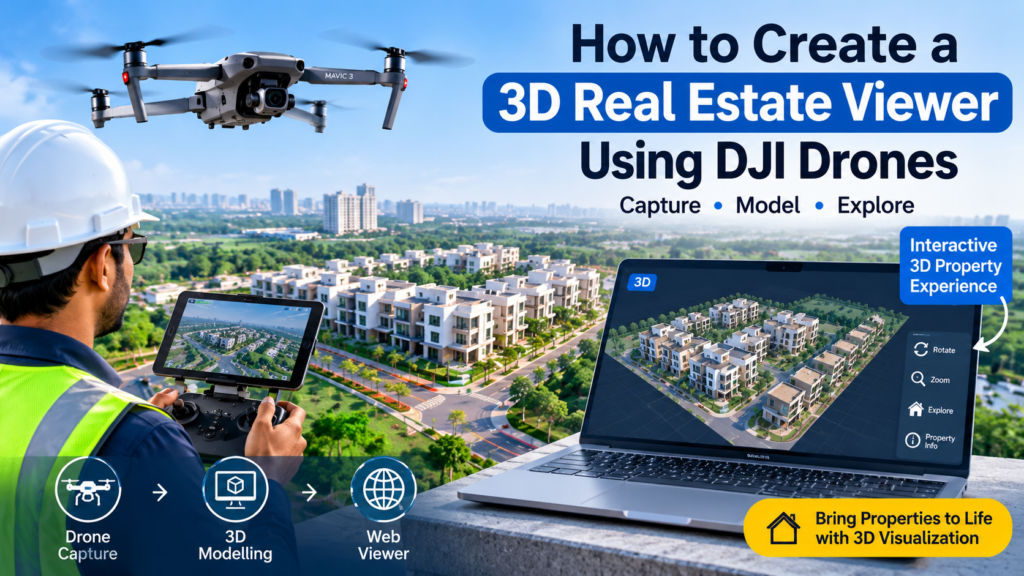
3D Real Estate Viewer Using DJI Drones. The real estate industry is moving towards more interactive digital property experiences. Buyers no longer want to depend only on brochures, photographs and conventional property videos. They want to understand the property, explore its surroundings and visualise the development before visiting the actual site.
One interesting technology making this possible is a 3D real estate viewer created using DJI drones.
By combining DJI drone photography, photogrammetry software and interactive 3D web technology, property developers can create digital representations of residential layouts, villas, apartments and commercial properties.
Imagine a potential buyer opening a property website, rotating a realistic 3D model, zooming into a building, exploring the surroundings and clicking on individual plots to view their details.
This is possible by combining drone-based 3D modelling with an interactive property viewer.
In this article, we will explore how to create a 3D property viewer using DJI drones, the equipment and software required, the image-capturing process, 3D model generation and website integration.
1. What Is a 3D Real Estate Viewer?
A 3D real estate viewer is an interactive digital representation of a property or development that allows visitors to explore the project from different angles.
Unlike a conventional property video, where the camera movement is predetermined, a 3D viewer allows users to control their viewing experience.
Depending on the technology used, visitors can:
- Rotate the property model.
- Zoom in and out.
- Explore buildings and surrounding areas.
- View residential layouts.
- Identify individual plots.
- Click on properties to see their information.
- View property photographs and videos.
- Explore selected locations and landmarks.
For example, a builder developing a 50-plot residential layout can create a digital property experience where buyers can view the complete layout, select a plot and check its availability, area, facing and price.
This makes a 3D real estate viewer useful for online property marketing and customer engagement.
2. How DJI Drones Help Create 3D Property Models
DJI drones capture aerial photographs from multiple positions and camera angles. These photographs can be processed using photogrammetry software to reconstruct a 3D representation of the captured environment.
The software identifies common features across overlapping photographs and uses them to calculate the spatial relationships between images.
The result can include:
- Textured 3D mesh models.
- Point clouds.
- Orthomosaic maps.
- Digital surface models.
- Digital elevation models.
The type of output depends on the drone, camera, image quality, capture method and processing software.
DJI Terra supports visible-light 3D reconstruction using drone photographs.
Official reference: DJI Terra – 3D Reconstruction
3. What DJI Drone Is Suitable for Real Estate 3D Modelling?
The right DJI drone depends on the project size, required model quality, budget and accuracy requirements.
Some options include:
DJI Air 2S
The DJI Air 2S can capture high-resolution aerial photographs that may be used for photogrammetry experiments and visual 3D reconstruction.
It can be useful for:
- Small property sites.
- Residential plot layouts.
- Villas and individual buildings.
- Basic 3D modelling experiments.
- Aerial visualisation projects.
However, the Air 2S does not have RTK positioning. Its consumer-camera workflow should not be treated as a survey-grade mapping solution. Accuracy must be independently assessed, and ground control points or other suitable surveying methods may be needed.
DJI Mavic 3 Enterprise
The Mavic 3 Enterprise series offers mapping-oriented capabilities, including RTK options depending on the configuration.
It is suitable for professional mapping and surveying workflows where the required equipment, control points and processing methods are selected appropriately.
DJI Matrice 4E
The Matrice 4E is designed for professional surveying and mapping applications. DJI describes its combination with DJI Terra for producing 2D and 3D mapping outputs.
Its mechanical shutter and RTK capabilities make it a more suitable option for professional mapping workflows where higher positioning accuracy is required.
Reference: DJI Matrice 4E and Construction Mapping
Important: A visually realistic 3D model and a survey-accurate model are not the same thing. If the project needs legally or commercially reliable measurements, use appropriate surveying equipment, control points and independent validation.
4. Step-by-Step: How to Capture Drone Images for 3D Modelling
Image capture is one of the most important stages in creating a good 3D property model.
Poor photographs, insufficient overlap and missing viewing angles can result in incomplete models, distorted buildings or gaps in the reconstructed surfaces.
Step 1: Plan the property survey area
Before flying the DJI drone, identify the complete area that needs to be modelled.
For a residential layout, include:
- The complete property boundary.
- Internal roads.
- Individual plot areas.
- Buildings and structures.
- Entrance roads.
- Visible surrounding development.
Plan sufficient coverage beyond the main site where permitted and useful for reconstructing the surroundings.
Step 2: Capture nadir photographs
Nadir photography means capturing images with the camera pointing vertically downwards.
These photographs help reconstruct the top surface and layout of the property.
They are particularly useful for:
- Roads.
- Open land.
- Plot layouts.
- Site boundaries.
- Ground features.
Step 3: Capture oblique photographs
Oblique photography means capturing photographs at an angle rather than pointing directly downwards.
This is important because vertical photographs alone may not contain sufficient visual information about building walls and other vertical surfaces.
Capture different sides and elevations of buildings, where permitted and safe.
For a 3D model of a villa, the photographs should include the front, sides, roof and other visible architectural features.
Step 4: Maintain sufficient image overlap
Photogrammetry requires overlapping photographs so that software can identify common features across multiple images.
The appropriate overlap depends on the camera, site conditions, flight altitude, terrain and processing workflow.
Avoid choosing a fixed overlap percentage without considering the mission and software requirements.
DJI Terra provides mapping and oblique mission options, including multiple camera viewing directions for 3D reconstruction.
Reference: DJI Terra Flight Mission Guidance
Step 5: Capture photographs in suitable lighting
Good lighting helps improve image quality and feature matching.
Recommended practices:
- Prefer consistent daylight.
- Avoid excessive motion blur.
- Maintain suitable exposure.
- Avoid unnecessary changes in camera settings.
- Capture sufficient photographs of important structures.
- Avoid reflections and repetitive featureless surfaces where possible.
Glass, water and large surfaces with similar colours or patterns can make reconstruction difficult.
5. How to Generate a 3D Model Using DJI Terra
Once the drone image collection is complete, the next stage is photogrammetric processing.
DJI Terra provides visible-light reconstruction capabilities for generating 2D and 3D outputs.
A typical workflow is:
Step 1: Import photographs
Transfer the captured drone photographs to a suitable computer and import the image dataset into DJI Terra.
Step 2: Aerotriangulation
The software analyses the images, identifies matching features and estimates camera positions and scene geometry.
Step 3: 3D reconstruction
Select the appropriate reconstruction workflow and process the photographs to generate a 3D model.
Step 4: Review the model
Check the output for:
- Missing surfaces.
- Distorted buildings.
- Gaps in structures.
- Incorrect textures.
- Incomplete property coverage.
- Alignment and scale issues.
Step 5: Export the model
Export a format supported by your selected 3D viewer or conversion workflow.
DJI Terra supports different 3D outputs, and DJI’s documentation explains the reconstruction process and available output options.
Reference: DJI Terra Operation Guide
6. Convert the 3D Model into a Web-Compatible Format
A 3D model generated by photogrammetry software may be too large or unsuitable for direct use on a website.
The model may need to be converted, compressed or tiled before publishing it online.
Common formats include:
OBJ
OBJ is a widely used 3D geometry format. It can be useful for exchanging models between 3D applications and viewer systems.
GLB and glTF
GLB and glTF are widely used for web-based 3D visualisation. They support geometry, materials and textures.
3D Tiles
3D Tiles are useful for streaming large geospatial models and displaying them efficiently in compatible web viewers.
For example, Cesium ion can convert supported 3D models into 3D Tiles for web visualisation.
Reference: Cesium – Tiling 3D Models
The right format depends on the model size, hosting setup, rendering engine and required user experience.
7. How to Build an Interactive 3D Property Viewer
After preparing the model, the next step is creating a website interface where customers can explore it.
There are several technologies that can be used.
Option 1: Three.js
Three.js is a JavaScript 3D library that can display GLB and glTF models in a browser.
Possible features include:
- Rotate and zoom.
- Camera controls.
- Interactive hotspots.
- Property labels.
- Information popups.
- Custom backgrounds.
- Project navigation.
Website: https://threejs.org/
Option 2: CesiumJS
CesiumJS is useful for geospatial visualisation and large 3D models.
It can display 3D Tiles and geospatial content in a browser.
This is particularly useful when the property viewer needs to show a project in its geographic context.
Website: https://cesium.com/platform/cesiumjs/
Option 3: Custom Web-Based 3D Viewer
A custom viewer can combine 3D models with property information, availability status, photographs, videos and enquiry forms.
For a real estate developer, this can be more useful than displaying a 3D model alone.
The viewer can be designed around the actual property-sales workflow.
8. Add Interactive Plot Marking to the 3D Viewer
One of the most useful applications of a 3D property viewer is interactive plot management.
Imagine a residential layout containing 50 plots.
Instead of showing only a static layout image, the website can allow visitors to select individual plots.
Each plot can have its own information:
- Plot number.
- Plot area.
- Facing direction.
- Availability status.
- Price.
- Property description.
- Images and videos.
- Enquiry button.
For example:
Plot 12
- Area: 1,200 sq. ft.
- Facing: East
- Status: Available
- Price: As specified by the developer
When a visitor clicks Plot 12, a popup can display its details.
Different colours can represent different availability statuses:
- Green – Available.
- Yellow – On Hold.
- Red – Sold.
These statuses should be updated from the developer’s property management data.
The result is a more interactive property-search experience.
9. Combine Drone 3D Models with 360° Virtual Tours
A 3D model and a 360° virtual tour are different technologies, but they can complement each other.
A 3D model provides a reconstructed representation of the site, while a 360° panorama provides an immersive photographic view from a specific camera position.
A combined real estate experience can include:
- An interactive 3D model of the property.
- Clickable plot or building markers.
- 360° views from selected locations.
- Property information popups.
- Project photographs and videos.
- Location maps.
- Enquiry and WhatsApp options.
For example, a buyer could select a plot on the 3D layout and open a 360° view showing the surrounding site from a relevant viewpoint.
Explore 360° Virtual Tour Services to understand how panoramic experiences can complement property marketing.
10. Add Real Estate Information to the 3D Viewer
A 3D model becomes more valuable when it provides useful information to buyers.
Consider adding the following sections to the viewer dashboard:
Project Overview: Project name, developer information and location.
Interactive Layout: Selectable plots or property units.
3D Project View: Explore the reconstructed site.
Project Gallery: Photographs of the property and amenities.
Project Video: Cinematic drone video and promotional content.
360° Site Visit: Interactive panoramic views.
Location Advantages: Verified nearby roads, transport facilities and landmarks.
Enquiry Form: Allow visitors to request pricing, availability or a site visit.
This transforms the viewer from a simple 3D model into a digital property presentation platform.
11. How to Host and Publish the 3D Viewer on a Website
After developing the viewer, publish it on a website or a dedicated property project URL.
A typical technical architecture looks like this:
- DJI drone captures property photographs.
- DJI Terra processes the photographs.
- The 3D model is exported and optimised.
- The model is uploaded to a web server or 3D hosting platform.
- A Three.js or CesiumJS viewer loads the model.
- Property information is loaded from a database or project JSON file.
- The viewer is embedded into the property website.
For large projects, consider:
- Model compression.
- Level of detail.
- Progressive loading.
- Mobile-friendly controls.
- CDN or suitable model hosting.
- Secure API access.
- Optimised textures.
A very large 3D model may load slowly on mobile devices. Model optimisation is therefore an important part of the development process.
12. Practical Challenges in Creating a 3D Real Estate Viewer
Although the technology is powerful, there are some challenges to consider.
Incomplete image coverage
If important areas are not photographed from sufficient angles, the 3D model may contain gaps.
Building surface reconstruction
Glass, reflective materials, thin structures and repetitive surfaces can create reconstruction problems.
Positioning accuracy
Consumer drone GPS data should not automatically be treated as survey-grade positioning. Use appropriate control points and independent checks where accuracy matters.
Large file sizes
High-resolution 3D models can contain millions of polygons and large textures. Optimisation is necessary for smooth web performance.
Property information updates
Plot availability, pricing and other project details may change. The viewer should use an updateable data source instead of permanently embedding changing information into the 3D model.
Flight permissions
Drone operations must comply with applicable Indian drone rules, airspace restrictions and location-specific permissions. Check the current requirements before every operation.
13. Business Opportunities for Real Estate Drone 3D Viewers
Builders and property promoters can use interactive 3D viewers in several ways.
Residential Plot Layouts: Let buyers explore the layout and select individual plots.
Villa Projects: Display buildings, outdoor areas and surrounding spaces.
Apartment Developments: Present building exteriors, project surroundings and selected amenities.
Commercial Properties: Showcase office buildings, warehouses and commercial developments.
Construction Progress: Maintain a series of aerial models to compare site development over time.
Property Sales Presentations: Use the viewer during customer meetings and online demonstrations.
The value is not simply the 3D technology. It is the ability to communicate useful property information through an interactive digital experience.
14. The Future of Real Estate Marketing: From Drone Shoots to Digital Property Experiences
Traditional real estate marketing generally uses photographs, brochures, property videos and online advertisements.
The next step is to connect these marketing assets through an interactive digital property experience.
A single project website could provide:
- Drone aerial photography.
- 3D property models.
- Interactive plot selection.
- 360° virtual tours.
- Project videos.
- Location information.
- Lead management.
- Customer enquiries.
This allows potential buyers to explore a project online before contacting the sales team.
For developers, it also creates a reusable digital presentation that can be updated as the project develops.
15. How MyDigitalBrand Can Help Create 3D Real Estate Experiences
MyDigitalBrand combines drone photography, visual media and digital marketing to help property developers present their projects online.
Our property visualisation approach can combine:
- DJI drone photography and videography.
- Aerial property presentation.
- 3D modelling workflows.
- Interactive property viewers.
- 360° virtual tours.
- Interactive plot information.
- Project videos and galleries.
- Landing pages and lead management.
- Digital marketing and advertising.
The objective is to move beyond a conventional property video and create a digital experience where prospective buyers can explore a project, understand its features and submit an enquiry.
For builders and property promoters, this can provide a more engaging way to present residential layouts, villas, apartments and commercial developments.
Explore our Real Estate Drone Shoot Services in Chennai and Digital Marketing Services.
Conclusion
Creating a 3D real estate viewer using DJI drones involves more than capturing aerial photographs. It requires careful image planning, photogrammetry processing, 3D model optimisation and interactive web development.
By combining DJI drone imagery, DJI Terra, 3D modelling technologies and web viewers such as Three.js or CesiumJS, developers can create interactive digital representations of their properties.
When combined with clickable plot information, 360° virtual tours, project videos and enquiry management, a 3D real estate viewer can become a valuable digital marketing and property presentation tool.
Want to transform your property into an interactive 3D experience?
Contact MyDigitalBrand to discuss drone-based property visualisation and interactive real estate viewer solutions.